


เสริมไฮโซให้ภาพ ด้วยเงา
ขั้นตอนที่*1
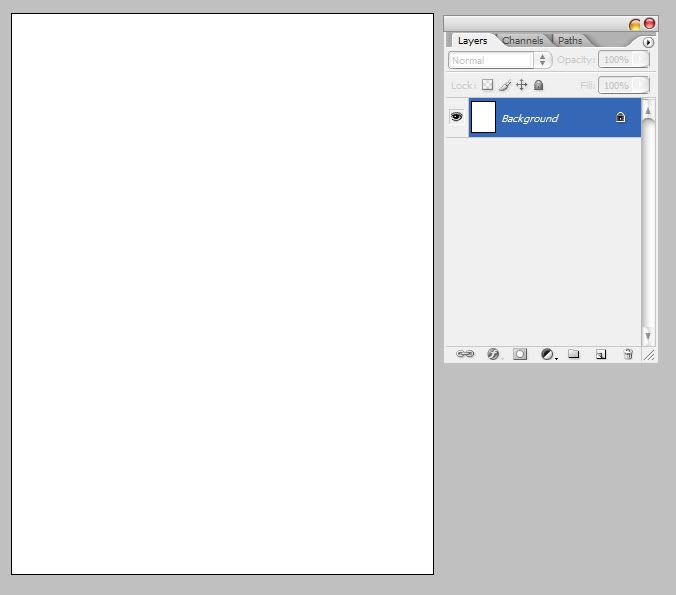
เปิดงานขึ้นมา โดยไปที่
File > New > openโดยเลือกขนาดตามใจชอบ
เอาเป็นว่าซักสัดส่วนภาพของท่านๆก็แล้วกัน
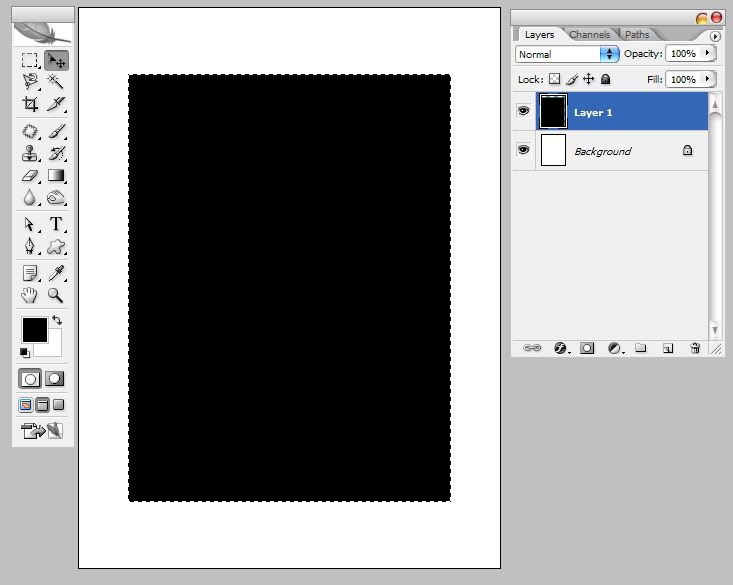
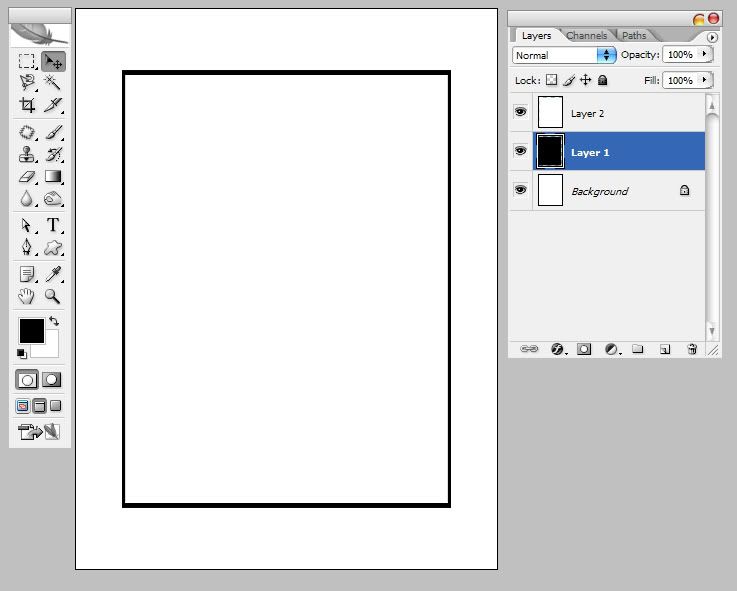
2** กด Ctrl+A เพื่อเลือกทั้งหมด
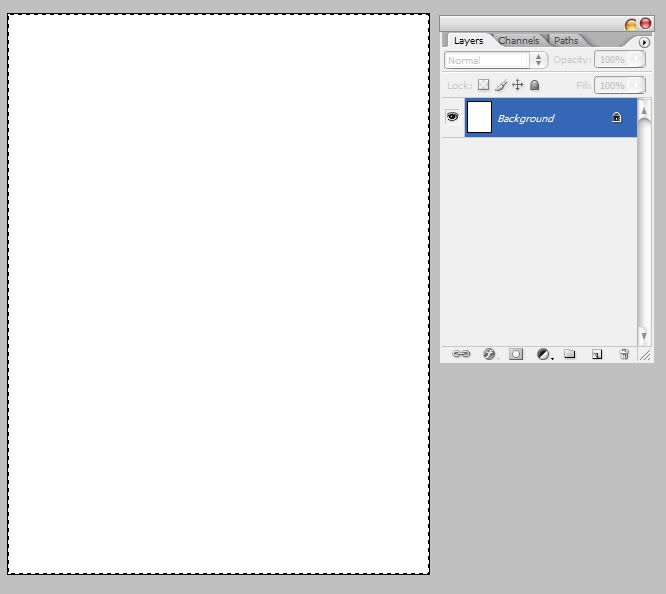
3**กด Ctrl+T เพื่อเรียก free Tranform
กดShift+Altไปด้วยในขณะDragเข้ามาเพื่อความสมมาตร
ลากเข้ามาประมาณภาพประกอบนะ

4** กดEnter

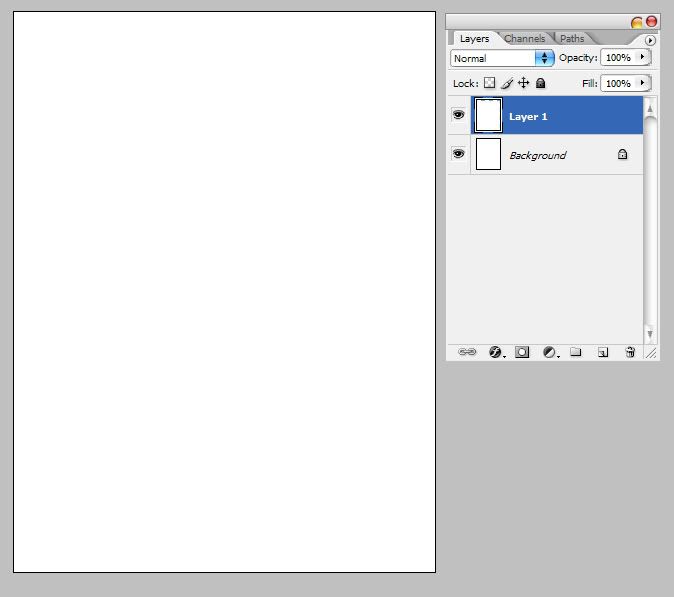
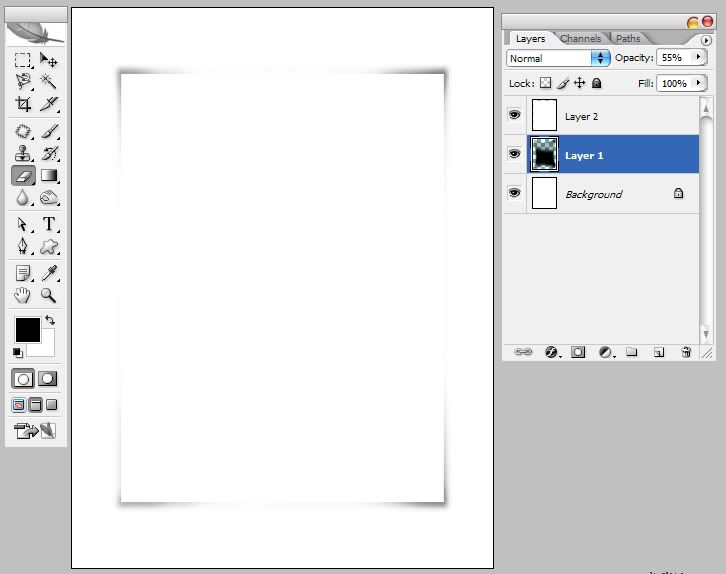
5** กด Ctrl+J เพื่อcopyส่วนที่เราเลือกไว้ มาเป็นlayerใหม่
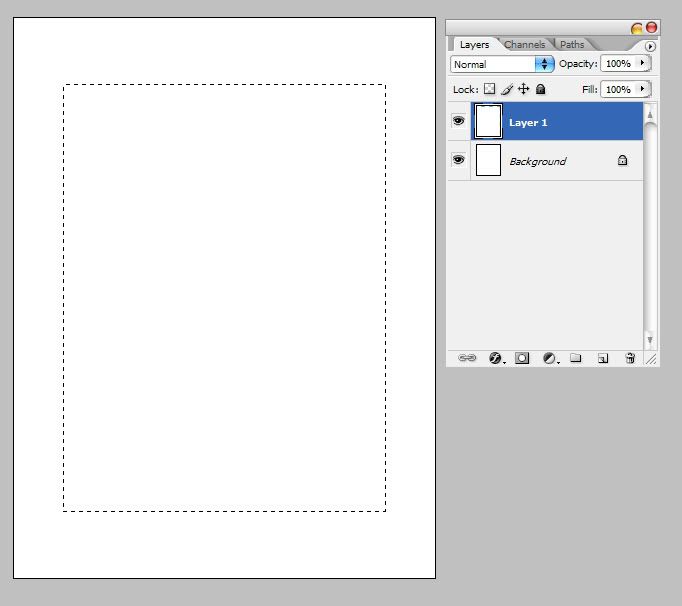
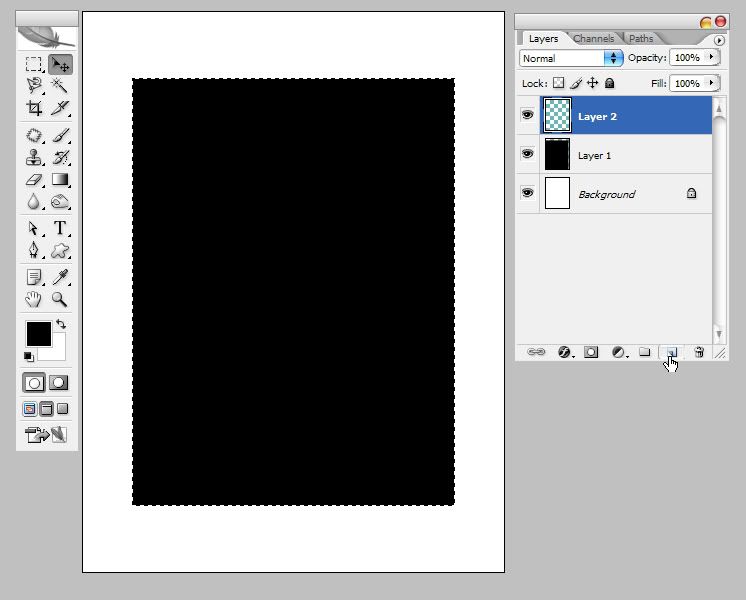
6**กดCtrlพร้อมคลิกที่"Layer1" เพื่อLoad Selection
"
7**เช็คดูให้แน่ใจ ว่าForegroundเป็นสีดำ
ถ้ายังไม่ใช่ให้กด D เพื่อresetสี...
เมื่อแน่ใจแล้วว่าForegroundเป็นสีดำ
ให้กด Alt+Del เพื่อfillสีดำ(Foreground)
8** คลิกnew layer(ตามที่นิ้วชี้ในภาพประกอบ)
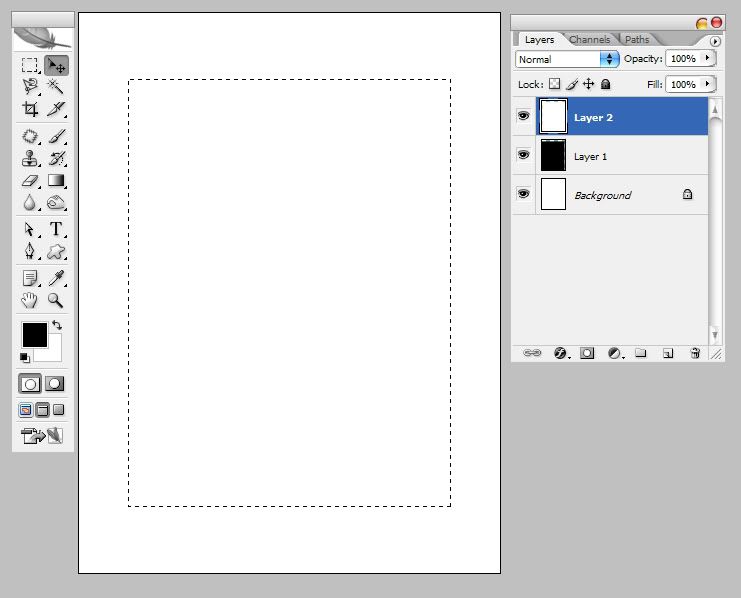
9**คราวนี้เราจะfillสีbackground(สีขาว)
กดCtrl+Del
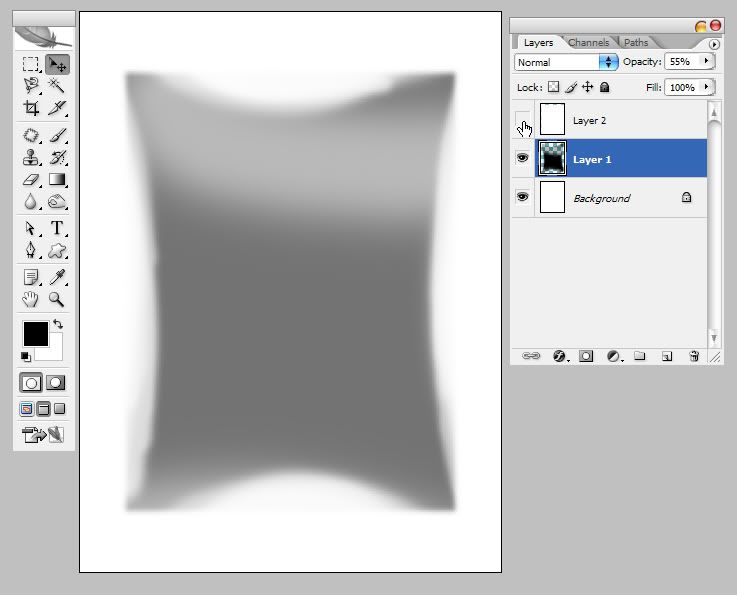
10*ใน Layer2 ให้กดCtrl+Tเพื่อเรียกfree Tranform
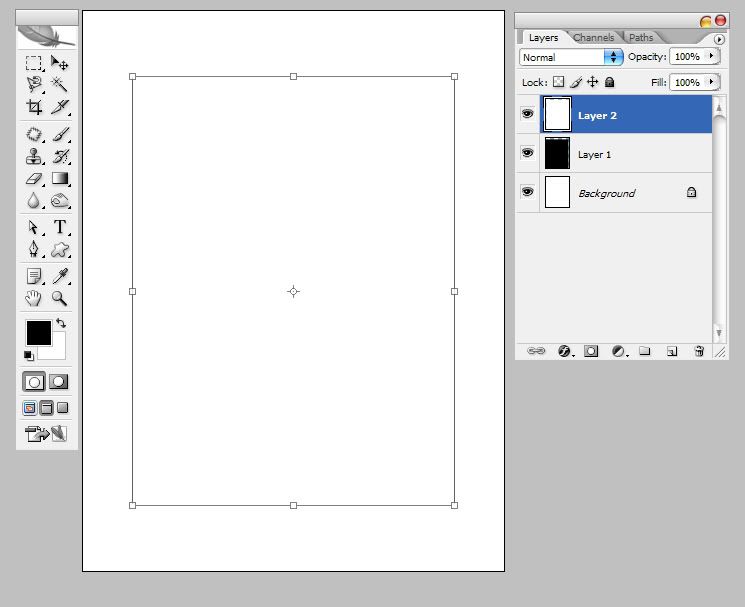
11**เข้ามาที่Layer1
กด Shift+Alt ไปด้วยในขณะDragเข้ามาเพื่อความสมมาตร
ลากเข้ามาให้เล็กลงกว่าเดิมเล็กน้อย
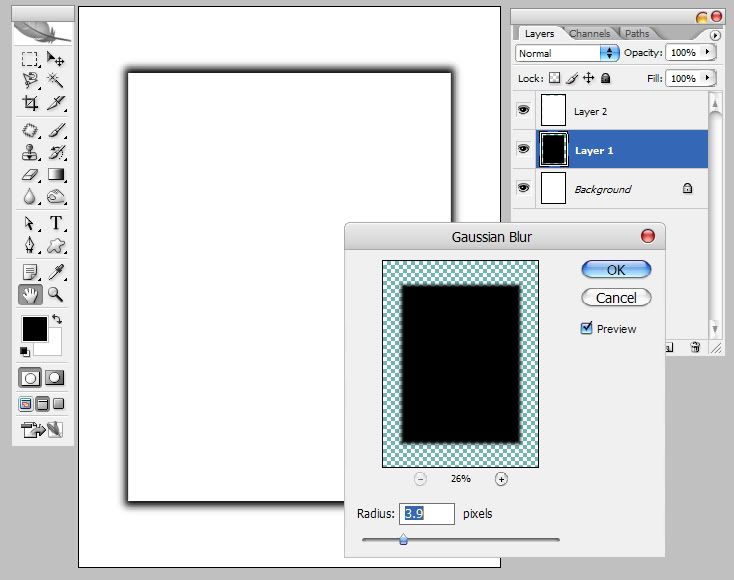
12**แล้วไปต่อที่
Filter>Gaussian Blur ปรับค่านิดหน่อย(นะ)
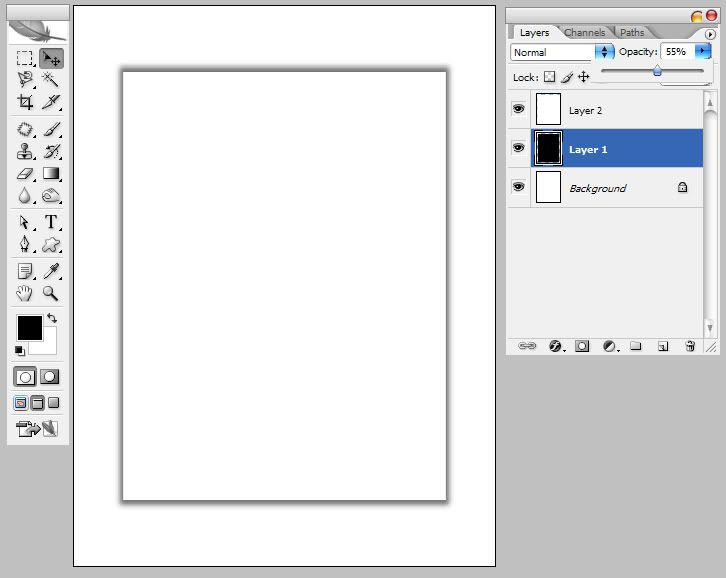
13**ผลที่ได้ครับ อ้ออย่าลืมปรับ opacity ในLayerนี้ให้เหลือซัก50-60%
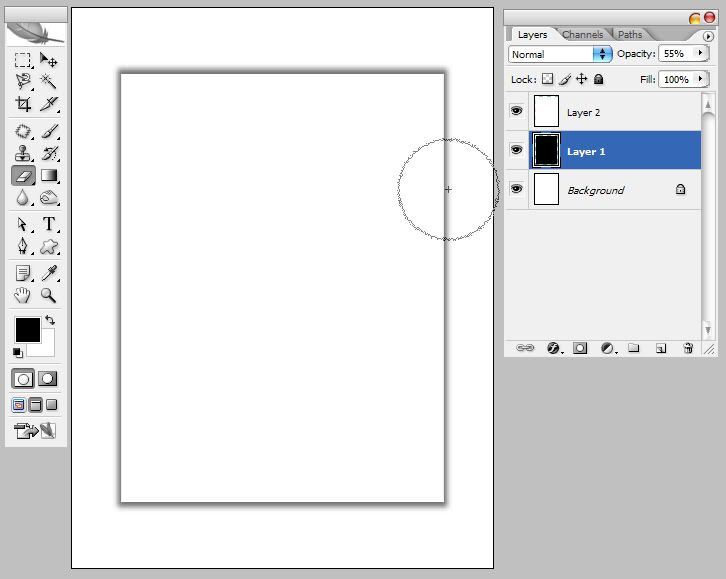
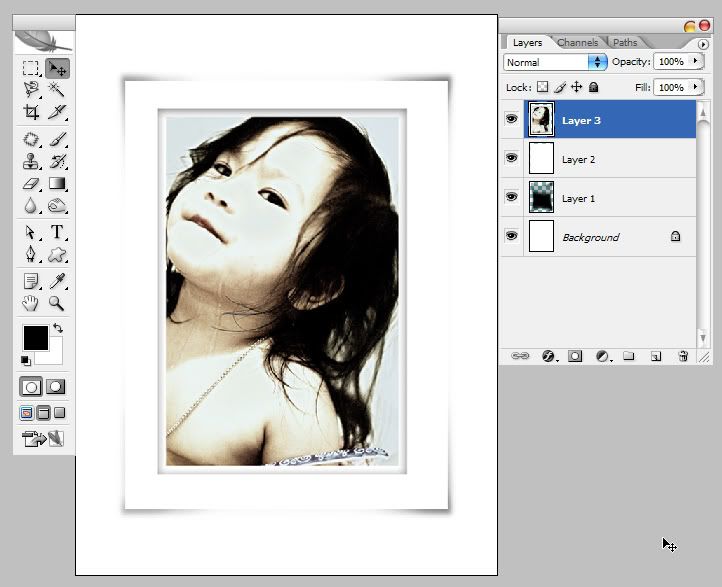
14**กด E เพื่อเรียกยางลบ ใช้หัวแปรงกลมๆแบบนุ่มๆ
ค่อยๆวนถูไป ตามด้านตรงทุกด้าน
ข้อสำคัญต้องเว้นมุมทั้ง4ให้เข้มที่สุด
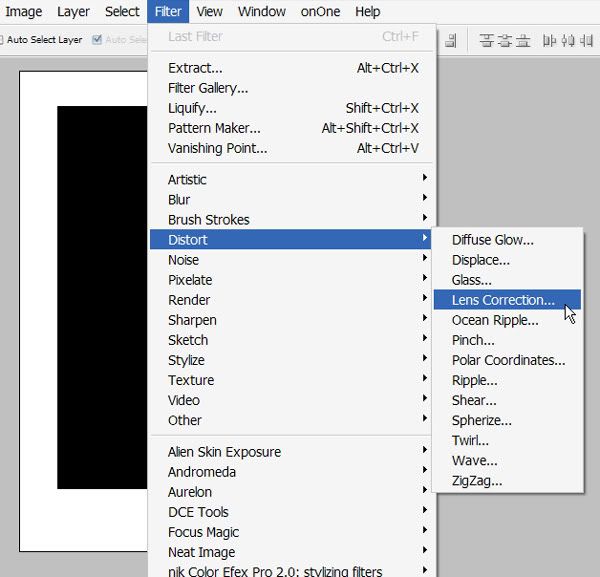
การทำในรูปแบบที่2
**2.0 ประเภท"บ้านไกล-เวลาน้อย-เมียคอยอยู่"ก็ให้ใช้เครื่องมือ
Lens Correctionแทนได้
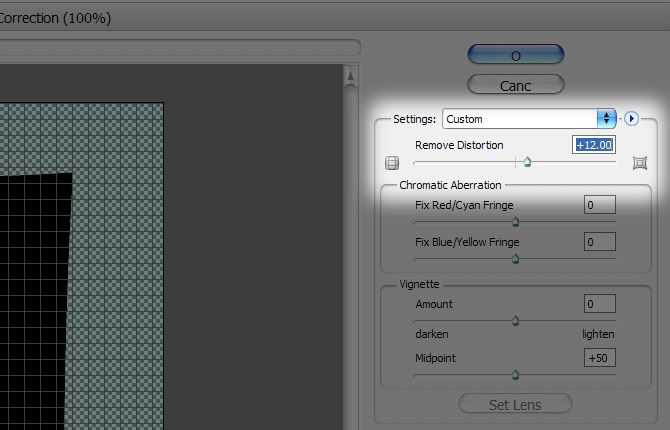
Filter>distrot>Lens Correction
แล้วเข้าไปเลื่อนที่หัวข้อRemove Distrotionโดยเลื่อนไปทางขวา
แต่ผลที่ได้จะค่อนข้างกระด้างไม่ธรรมชาติ
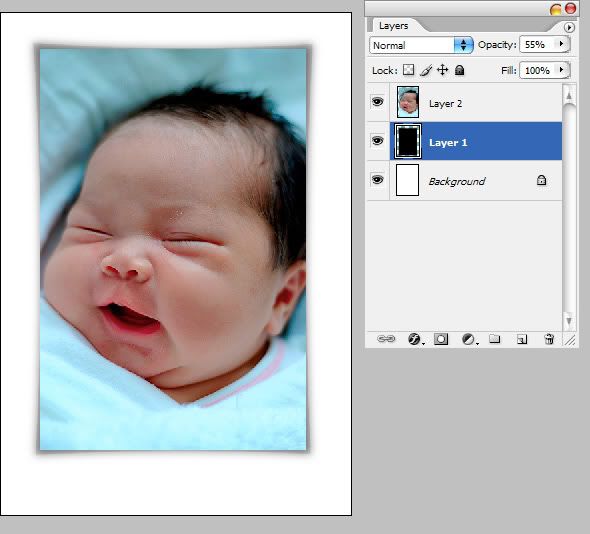
15**ในส่วนของยางลบ อย่าลืมปรับOpacityให้เหลือซัก50%

16**เสร็จแล้ว เย๊~~~~
17**ลองปิดLayer2เพื่อดูทิศทางการถูของยางลบในLayer1
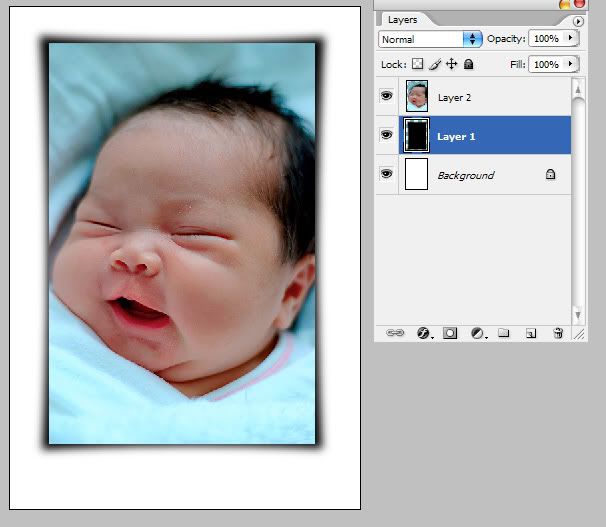
18**เปิดตาทุกLayer แล้วลองลากภาพมาวาง
ให้ภาพนี้อยู่Layerบนสุด
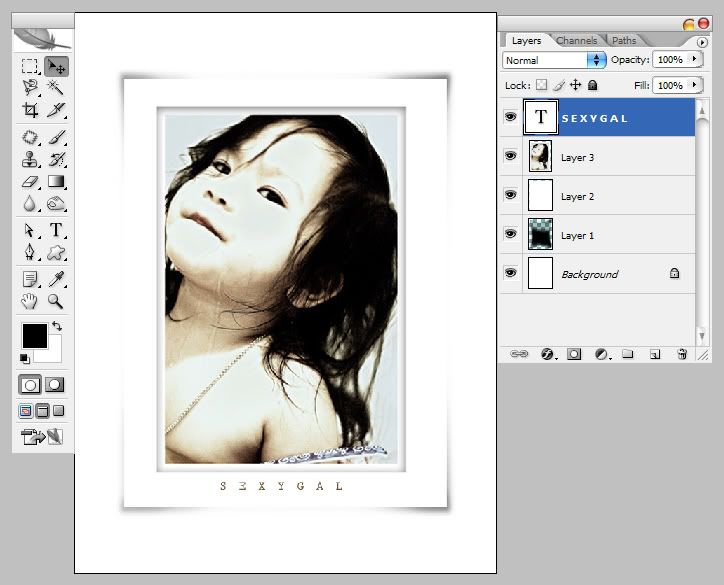
19**ลองใส่ชื่อภาพดู
การทำในรูปแบบที่2
**2.0 ประเภท"บ้านไกล-เวลาน้อย-เมียคอยอยู่"ก็ให้ใช้เครื่องมือ
Lens Correctionแทนได้
Filter>distrot>Lens Correction
แล้วเข้าไปเลื่อนที่หัวข้อRemove Distrotionโดยเลื่อนไปทางขวา
แต่ผลที่ได้จะค่อนข้างกระด้างไม่ธรรมชาติ
**2.1 ค่อยๆปรับเครื่องมือในภาพให้สไลด์ไปทางขวาทีละนิด อย่าให้มากเกินไป
"
**2.2 แล้วใช้Free transform ปรับดึงออกมาให้ได้ขนาดที่เหมาะสม
(คือให้แพลมๆมานิดนึงก็พอ)
i
**2.3 ใส่เบลอๆให้ซักหน่อยเพื่อความสมจริง
Filter>Blur>Gaussian Blur
**2.4 ปรับค่าOpacityลงอีกนิดหน่อย ก็เป็นอันเสร็จสิ้น
ขอบคุณค่ะ เฮีย go-or-g
ขั้นตอนที่*1
เปิดงานขึ้นมา โดยไปที่
File > New > openโดยเลือกขนาดตามใจชอบ
เอาเป็นว่าซักสัดส่วนภาพของท่านๆก็แล้วกัน
2** กด Ctrl+A เพื่อเลือกทั้งหมด
3**กด Ctrl+T เพื่อเรียก free Tranform
กดShift+Altไปด้วยในขณะDragเข้ามาเพื่อความสมมาตร
ลากเข้ามาประมาณภาพประกอบนะ
4** กดEnter
5** กด Ctrl+J เพื่อcopyส่วนที่เราเลือกไว้ มาเป็นlayerใหม่
6**กดCtrlพร้อมคลิกที่"Layer1" เพื่อLoad Selection
"
7**เช็คดูให้แน่ใจ ว่าForegroundเป็นสีดำ
ถ้ายังไม่ใช่ให้กด D เพื่อresetสี...
เมื่อแน่ใจแล้วว่าForegroundเป็นสีดำ
ให้กด Alt+Del เพื่อfillสีดำ(Foreground)
8** คลิกnew layer(ตามที่นิ้วชี้ในภาพประกอบ)
9**คราวนี้เราจะfillสีbackground(สีขาว)
กดCtrl+Del
10*ใน Layer2 ให้กดCtrl+Tเพื่อเรียกfree Tranform
11**เข้ามาที่Layer1
กด Shift+Alt ไปด้วยในขณะDragเข้ามาเพื่อความสมมาตร
ลากเข้ามาให้เล็กลงกว่าเดิมเล็กน้อย
12**แล้วไปต่อที่
Filter>Gaussian Blur ปรับค่านิดหน่อย(นะ)
13**ผลที่ได้ครับ อ้ออย่าลืมปรับ opacity ในLayerนี้ให้เหลือซัก50-60%
14**กด E เพื่อเรียกยางลบ ใช้หัวแปรงกลมๆแบบนุ่มๆ
ค่อยๆวนถูไป ตามด้านตรงทุกด้าน
ข้อสำคัญต้องเว้นมุมทั้ง4ให้เข้มที่สุด
การทำในรูปแบบที่2
**2.0 ประเภท"บ้านไกล-เวลาน้อย-เมียคอยอยู่"ก็ให้ใช้เครื่องมือ
Lens Correctionแทนได้
Filter>distrot>Lens Correction
แล้วเข้าไปเลื่อนที่หัวข้อRemove Distrotionโดยเลื่อนไปทางขวา
แต่ผลที่ได้จะค่อนข้างกระด้างไม่ธรรมชาติ
15**ในส่วนของยางลบ อย่าลืมปรับOpacityให้เหลือซัก50%
16**เสร็จแล้ว เย๊~~~~
17**ลองปิดLayer2เพื่อดูทิศทางการถูของยางลบในLayer1
18**เปิดตาทุกLayer แล้วลองลากภาพมาวาง
ให้ภาพนี้อยู่Layerบนสุด
19**ลองใส่ชื่อภาพดู
การทำในรูปแบบที่2
**2.0 ประเภท"บ้านไกล-เวลาน้อย-เมียคอยอยู่"ก็ให้ใช้เครื่องมือ
Lens Correctionแทนได้
Filter>distrot>Lens Correction
แล้วเข้าไปเลื่อนที่หัวข้อRemove Distrotionโดยเลื่อนไปทางขวา
แต่ผลที่ได้จะค่อนข้างกระด้างไม่ธรรมชาติ
**2.1 ค่อยๆปรับเครื่องมือในภาพให้สไลด์ไปทางขวาทีละนิด อย่าให้มากเกินไป
"
**2.2 แล้วใช้Free transform ปรับดึงออกมาให้ได้ขนาดที่เหมาะสม
(คือให้แพลมๆมานิดนึงก็พอ)
i
**2.3 ใส่เบลอๆให้ซักหน่อยเพื่อความสมจริง
Filter>Blur>Gaussian Blur
**2.4 ปรับค่าOpacityลงอีกนิดหน่อย ก็เป็นอันเสร็จสิ้น
ขอบคุณค่ะ เฮีย go-or-g
 บันทึกการเข้า
